Why this is harder than it should be
A Mac does not have a “show me my biggest files” button. Storage settings gives you categories, not files. Finder can sort a single folder by size but not a whole disk. Spotlight can search by size, but it only searches what it has indexed and it will not tell you which folder is the problem. So the honest answer is that there are three ways to do this, from slowest to fastest, and you should pick based on how much you need to find.
Method 1: Finder, one folder at a time
Free, built in, and fine when you already suspect a folder.
- Open the folder in Finder and switch to list view (View → as List, or Cmd + 2).
- Press Cmd + J to open View Options and tick Calculate all sizes. Without this, folders show “--” in the Size column.
- Click the Size column header to sort largest first. Wait; on a big folder the sizes fill in over a minute or two.
- Open the largest folder and repeat.
The limitation is obvious once you try it on your Home folder: you are drilling blind, one level at a time, and each level takes a recalculation. It also cannot see inside the hidden ~/Library unless you press Cmd + Shift + . to show hidden files first.
Method 2: A Finder search by size
Better when you want individual large files rather than large folders.
- In Finder, press Cmd + F to start a search. Make sure the search scope is This Mac, not the current folder.
- Click the first dropdown (it says Kind) and choose Other…, then tick File Size and press OK.
- Set the condition to is greater than and type a threshold. 500 MB is a good start; 1 GB if the disk is very full.
- Switch to list view and sort the results by Size.
This finds forgotten disk images, old screen recordings and exported video well. It misses two things: folders made of thousands of small files (caches, node_modules, photo libraries, which Finder treats as one package), and anything Spotlight has not indexed, including most of ~/Library.
Method 3: A disk analyzer
This is the method that actually answers the question for the whole disk, and it is why disk analyzers exist. Instead of a list, you get a treemap: every folder is a rectangle, and the rectangle’s area is its size. Big things are big. You do not sort or search; you look.
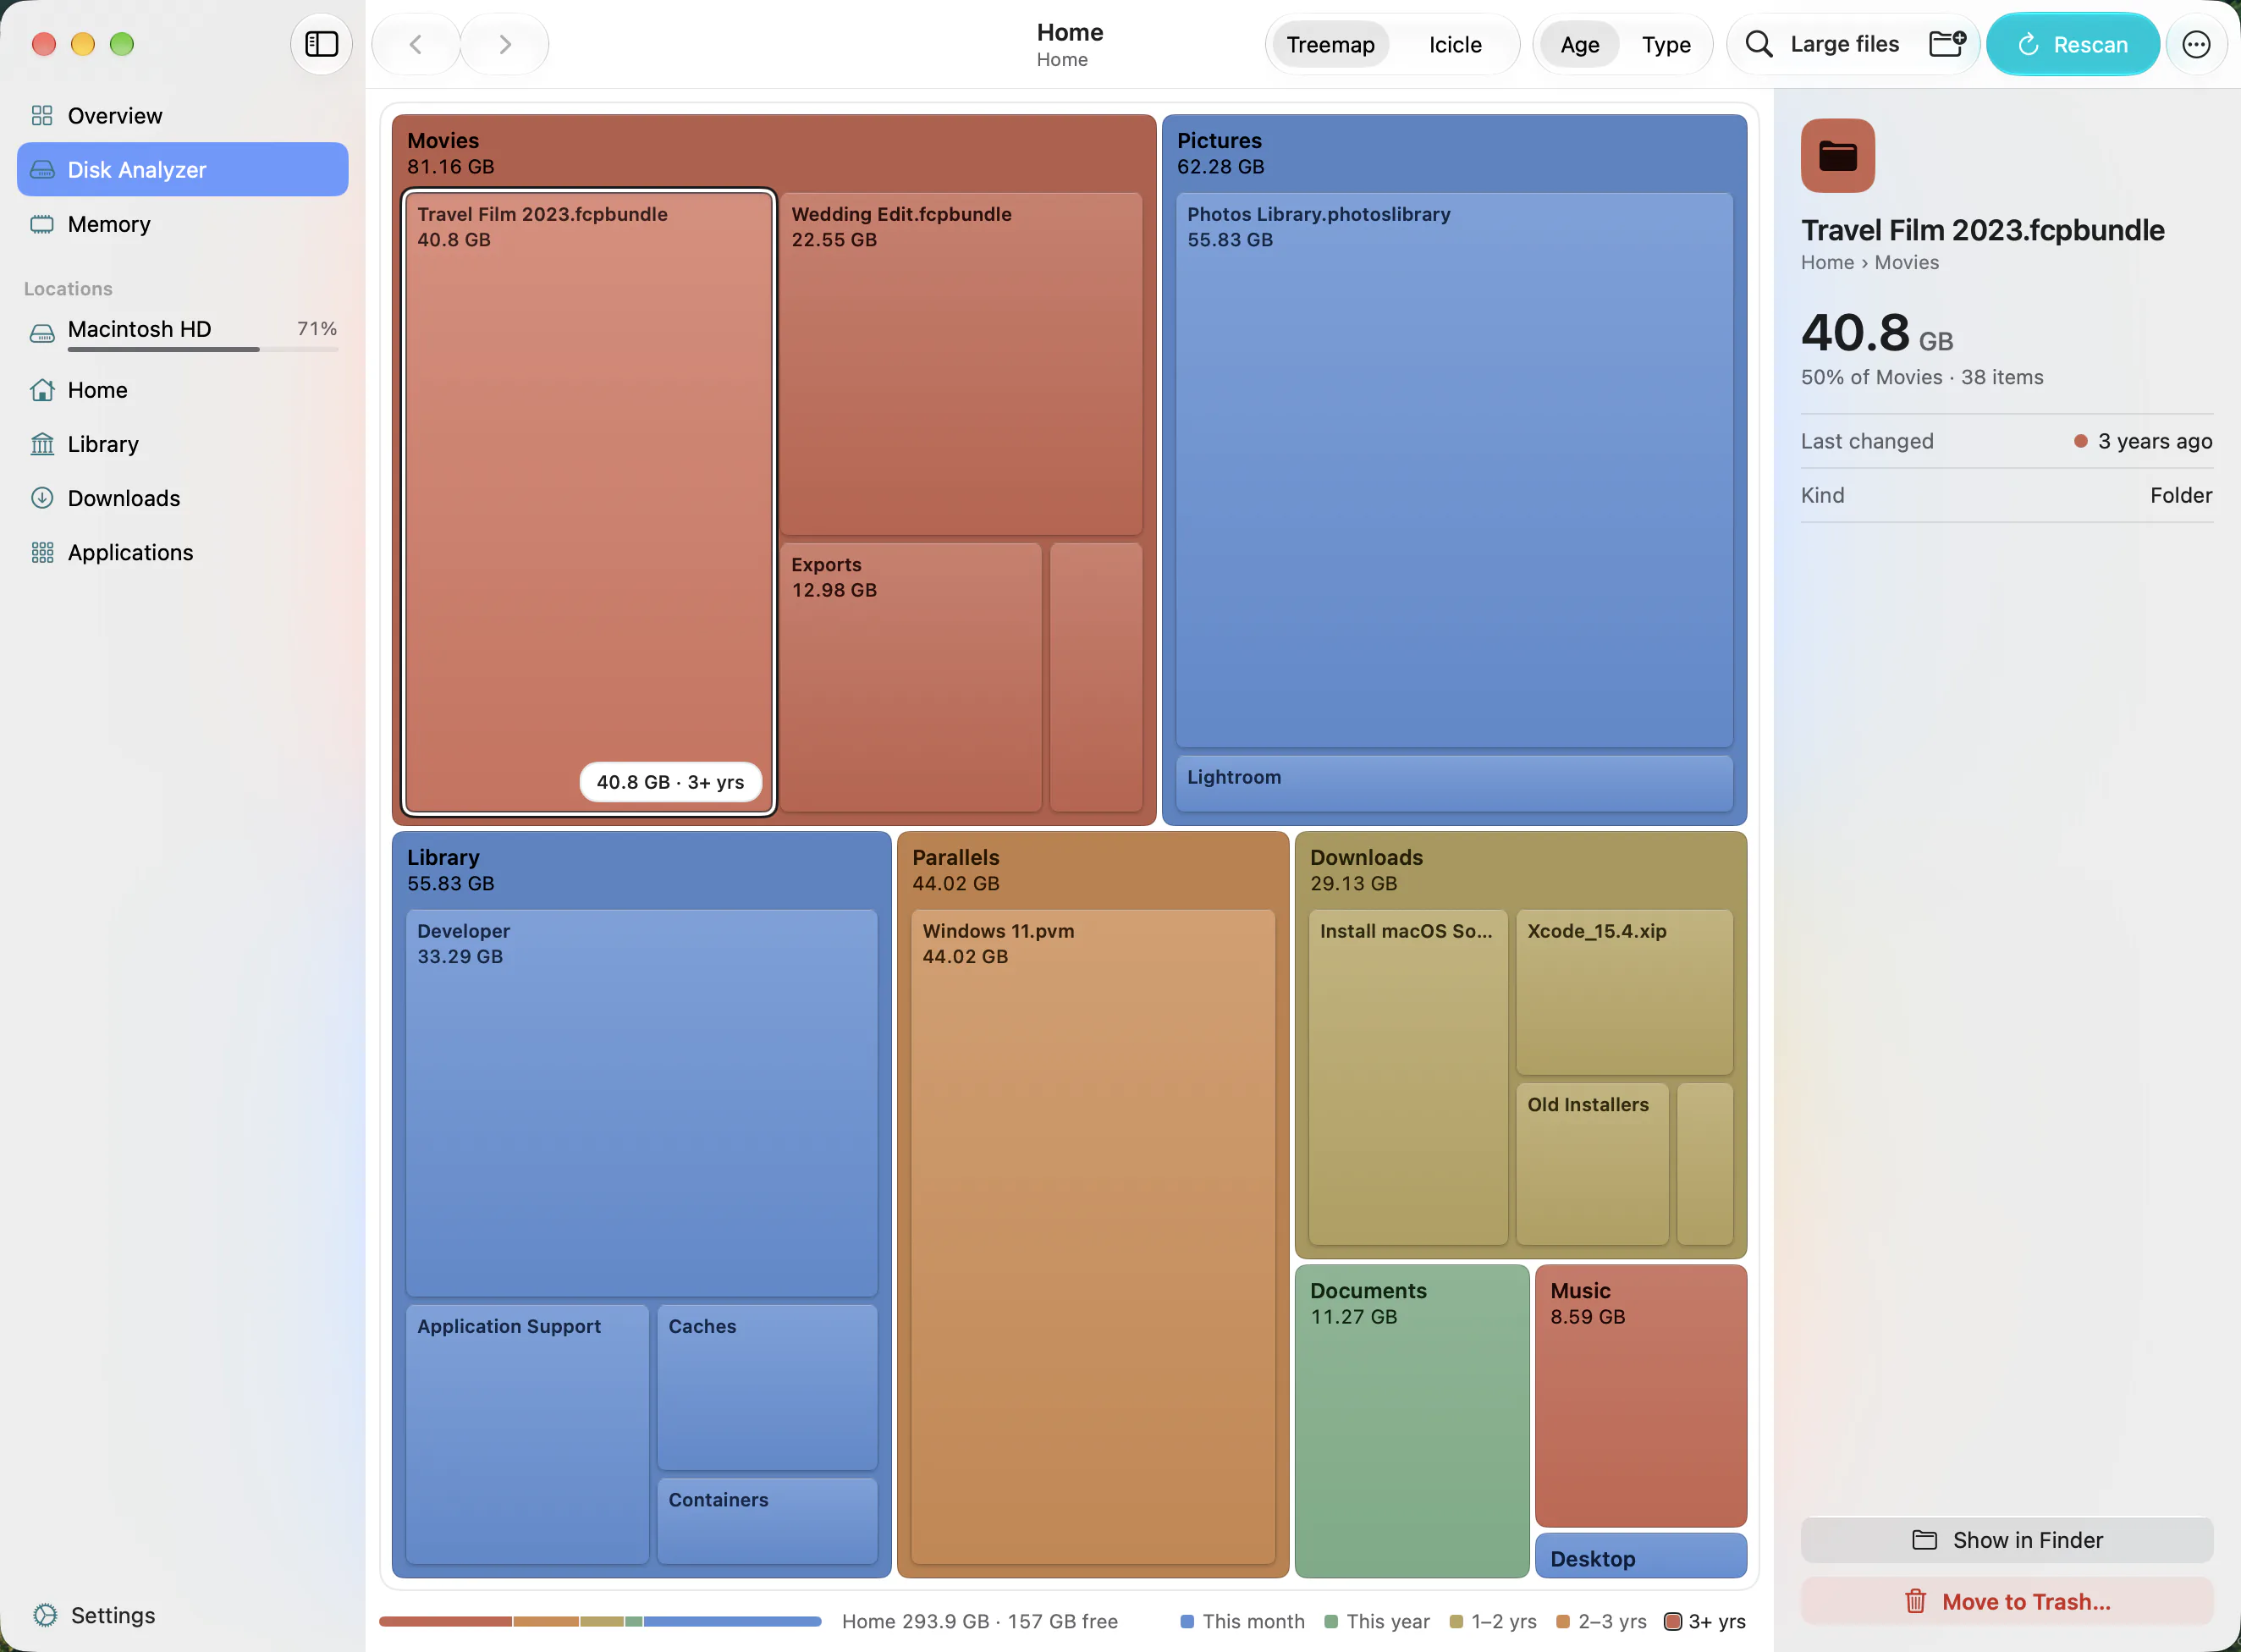
In Klarity (a Mac disk space analyzer, $6.99 on the App Store), the flow is:
- Open the app from the menu bar and pick a starting point in the sidebar: Home, Downloads, Macintosh HD for the whole disk, or an external drive under Devices. Choose Folder… in the toolbar covers anything else. The first time you scan outside your home folder, macOS asks you to grant access once.
- Let the scan run. A home folder with a few hundred thousand files takes seconds on an SSD.
- Look at the treemap. The largest rectangles are your answer. Click one and the inspector shows its exact size; double-click to drill in; press Escape to come back up.
- Click Large files in the toolbar for a flat list of large files from what you scanned, sorted largest first. Filter by type (video, images, archives, disk images and so on) or by age (older than 30 days, 90 days, 6 months, a year) to find the stale ones.
- Right-click anything to Reveal in Finder or Move to Trash. Trash always asks first, and a folder of 1 GB or more needs a slide to confirm.
Size alone is not enough: a 30 GB folder you used yesterday is not clutter. Klarity colours every rectangle by its last-modified date, so the useful combination, large and old, stands out immediately. More on that in how to find old files on a Mac. The filters in the Large Files list do the same thing for individual files.
Where the large files usually are
After scanning a lot of Macs, the same suspects come up nearly every time. Check these first, whichever method you use — they are also where the room for a macOS 27 upgrade usually comes from:
- ~/Downloads: installers, disk images, zip archives you already extracted.
- ~/Movies and ~/Desktop: screen recordings, exported video, Zoom recordings.
- ~/Library/Developer: Xcode DerivedData, simulator runtimes and device support files. Often the largest single folder on a developer’s Mac.
- ~/Library/Caches: app caches. Safe to clear; apps rebuild them.
- ~/Library/Application Support/MobileSync/Backup: iPhone and iPad backups. Delete these through Finder’s Manage Backups, not by hand.
- ~/Library/Containers: data for sandboxed apps, including Mail attachments and Messages media.
- Virtual machine and Docker images: wherever Parallels, UTM or Docker Desktop keep them, and they only ever grow.
Notice how many of those are inside ~/Library, which macOS hides. That folder is also most of the grey “System Data” bar in Storage settings. If that bar is what sent you here, read what System Data on a Mac actually is next, and for the deleting half of the job, how to clean up Mac storage safely.
Terminal, for completeness
The title promised no Terminal, and you do not need it. But if you are comfortable there, one command does the folder-sizing part: du -sh ~/* ~/Library/* 2>/dev/null | sort -rh | head -20 lists the twenty largest items in your home folder and Library. It is slow on a big disk, shows sizes in a list rather than to scale, and you still have to repeat it for every level you drill into. That repetition is the whole reason the treemap exists.
Before you delete
Finding is the safe half. Two rules for the other half: move things to the Trash rather than deleting outright, and if you cannot say what created a file, leave it. The guide on cleaning up Mac storage goes through what is safe category by category.
Klarity is $6.99 on the Mac App Store, one payment, and the scan-look-act loop above is about thirty seconds on most Macs. If something here is out of date, let me know.
Questions people ask
How do I see file sizes on a Mac?
In Finder, switch to list view (Cmd + 2), press Cmd + J and turn on Calculate all sizes, then click the Size column. For a single file or folder, select it and press Cmd + I.
How do I find files over 1 GB on a Mac?
Press Cmd + F in Finder, set the scope to This Mac, add a File Size condition from the Other… list, and set it to greater than 1 GB. This finds large individual files but not folders made of many small files.
Why doesn't Finder show the size of folders?
Folder sizes are off by default because calculating them is slow. Turn on Calculate all sizes in View Options (Cmd + J) for the current folder, or use a disk analyzer that computes every folder in one pass.
What is the fastest way to find large files on a Mac?
A disk analyzer that draws a treemap. One scan sizes every folder on the disk and shows them to scale, so the biggest items are visible at a glance instead of being found one folder at a time.
— Mukul